
If you are looking for screen recording software, then iFun Screen Recorder is the right choice. Simply because it is free and fully functional. In this article, I will introduce iFun Screen Recorder in the following two parts:
Part 1: Main Features of iFun Screen Recorder
Part 2: How to Use iFun Screen Recorder?
Part 1: Main Features of iFun Screen Recorder
Record with Audio and Click Effects
iFun Screen Recorder not only gives you the flexibility to capture full screen or any selected part of the screen and webcam but also supports recording audio from the microphone and speakers into video. Hence, it’s great for recording online lessons or screen recording to instruct someone, etc. Besides, you can add click effects by highlighting the cursor and adding animations every time you click. You can also take screenshots while recording.
No Limitation & Multiple Formats
iFun Screen Recorder has no screen recording time limit. Of course, there is always the feature that blurs places on Videos that you don’t want others to see. The software supports saving video formats such as MP4, AVI, MOV, TS, FLV, MKV, and GIF.
Basic Editing Features
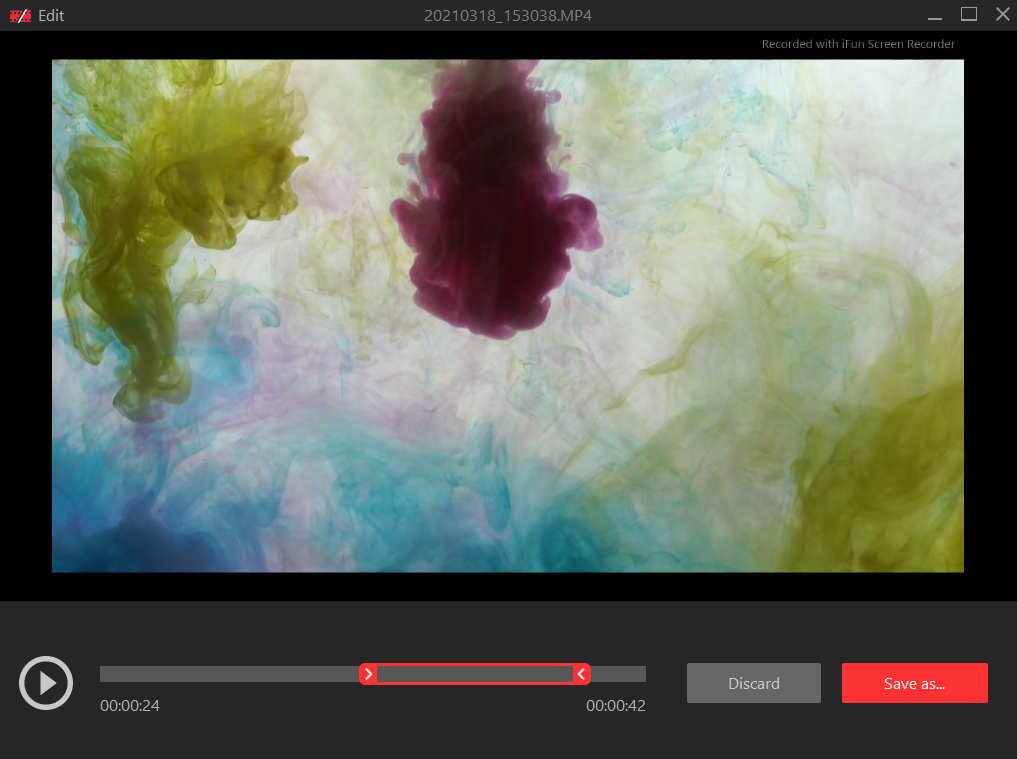
Besides, iFun Screen Recorder also features a basic video editor for cutting, cutting, and splitting recorded videos. This application applies GPU hardware acceleration technology to make video recording and editing more efficient and stable.
Quick Share to YouTube etc.
Last but not least, after recording your screen, you can immediately share and always go straight to YouTube, Facebook, Instagram, Vimeo, Google Drive, and Dropbox.
To sum in short, iFun Screen Recorder is a fairly stable free screen recorder for anyone wishing to record screen and webcam combined with basic video editing.
Part 2: How to Use iFun Screen Recorder
To use iFun Screen Recorder’s free screen recording software is quite simple. First of all, you need to download the software from iFun Screen Recorder homepage and install it on your PC.
Here is how to use iFun Screen Recorder to record your screen with only 3 simple steps:
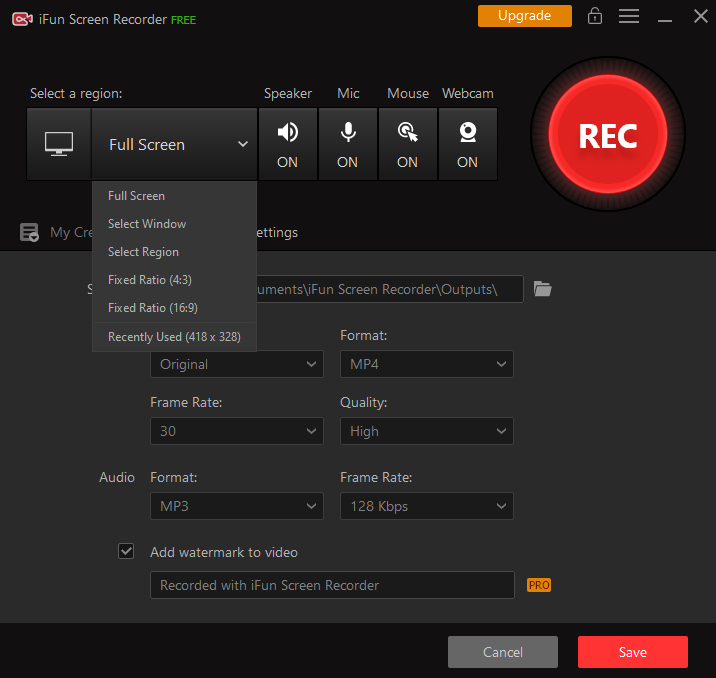
Step 1: Select the area on the screen you want to record. Set Speaker, Microphone, Mouse effect, Webcam overlay ….
You can also click Recording Settings to customize the video storage location, video size, format, quality when exporting files….
Step 2: To start recording, press the red REC button. When recording the screen, you will feel very smooth and almost no seconds of jerky, lag, or delay images. This is what I like most about this software.
Step 3: Press the red square to finish the recording. The video will be automatically saved in any format you previously set. Clicking the Video List to find it and edit it right in that window (trim, adjust audio, etc.). Then right-click the video and upload it to YouTube, Facebook, Vimeo, Instagram, etc.
So you have completed the video recording, I find the output quality is quite good up to 4K and the capacity is not much. If you regularly record tutors or lectures or your operations on your computer, you should choose to install iFun Screen Recorder because it is better than other online screen recorder since it is free but with many features that can meet all your needs.
Follow Techiemag for more!
Table of Contents


![[pii_email_4349dab0e0760840840a]](https://www.techiemag.net/wp-content/uploads/2020/06/Mobile-App-100x75.jpeg "11 BEST Data Recovery Software in 2020")