
A flowchart is a great tool for conveying information visually and in a manner that’s simple to comprehend, especially for newcomers. If you know how to build a flowchart, you’ll have an easier time organizing your ideas and communicating your findings to others.
Other than that, they’re used in just about every sector and field imaginable. You’ll need to be able to read and interpret flowcharts since they’re utilized by workers all around the company. Both the benefits and implementation details of using flowcharts are covered in this article. We’ll also go over some guidelines for drawing together a flowchart to assist you.
1. Make a Flowchart in 8 Steps
Flowcharts may be created online, without the need for any special software, or by downloading one of many available programs. No matter what you do, make sure the flowchart has all it needs. Keep everything well-organized and simple to read. For simplicity’s sake, utilize simple terminology. Read on to discover the eight stages required to make a flowchart.
Step 1: Know the Purpose of the Flowchart
The purpose of a flowchart is to provide a visual representation of a process or set of data. It’s a great tool for sharing knowledge and making points clear to others. Having the ability to create a flowchart is useful, but understanding why they are used is essential. That will guide your prioritization of the data. Flowcharts, for instance, are used in the development of new goods and services.
Your mission may need you to facilitate the visualization of data or the resolution of problems for other people. Knowing who will be using your flowchart might help you determine its purpose. You may make it generic unless it’s meant for internal consumption. In order to prevent any misunderstandings, you should be more precise if you plan on sharing information with other teams or other parties.
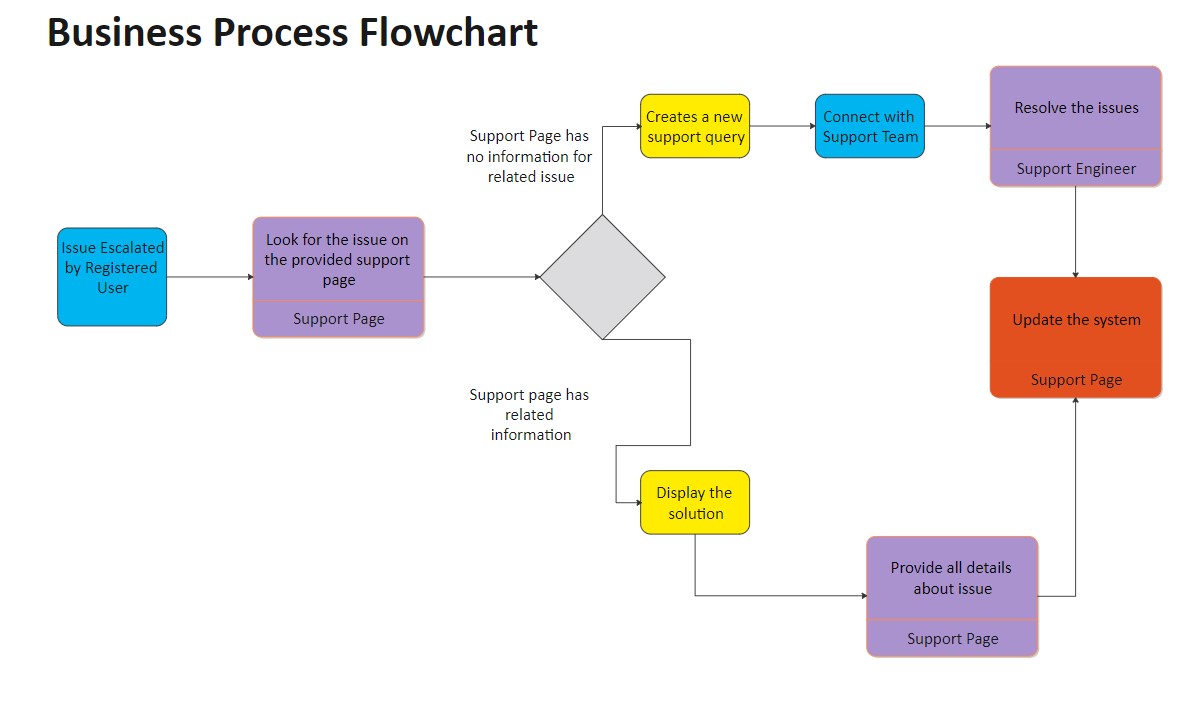
Step 2: List the Steps and Decisions on the Draft
Steps should be written down before a flowchart is created. It will aid in the process by allowing you to better organise your ideas. You may review previously collected information on the system or procedure in issue. What comes to mind are examples like as
- Taking note of how the team interacts and the challenges they face while doing so.
- Analyzing the reports detailing the process’s present state and any problems it may have.
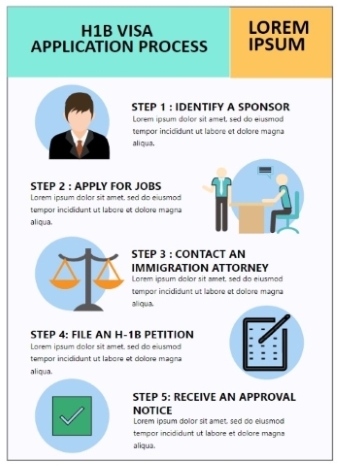
With the knowledge you get from following this approach, you’ll be able to make necessary adjustments for optimal results. See the picture of the visa application process below for a visual guide.
Step 3: Select a Proper Flowchart Maker
Flowcharts may be made quickly and easily with the use of software that provides premade layouts, icons, and other tools. Flowcharts are easy to make with the help of Microsoft Office programmes like Excel, Word, and PowerPoint. However, these resources don’t allow for real-time teamwork, have a limited sketching canvas, and few sharing possibilities.
The online and downloadable programme of EdrawMax allows users to construct flowcharts from scratch or with the help of templates on an infinite canvas and with an intuitive interface. You may make them your own by, for example, adding text or altering the color scheme. Your group may collaborate online in real-time with EdrawMax Online.
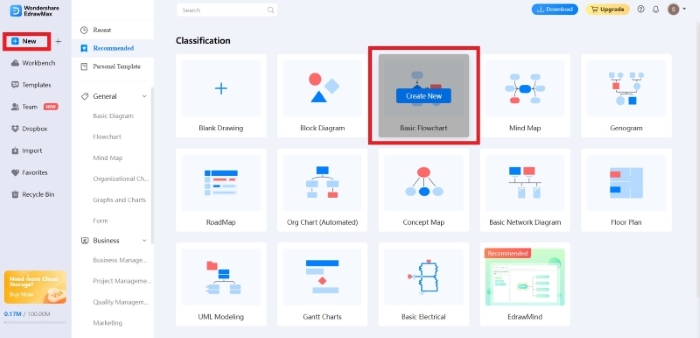
Step 4: Make a Flowchart from a Blank Canvas or Template
Select the most suitable method of diagramming. There are several varieties of flowchart software available; choose the one that is most appropriate for your needs. It’s easy to use EdrawMax Online after you register for an account. You may start a brand new flowchart by selecting New in the left-hand menu. Select Classification, and then select the Basic Flowchart button.
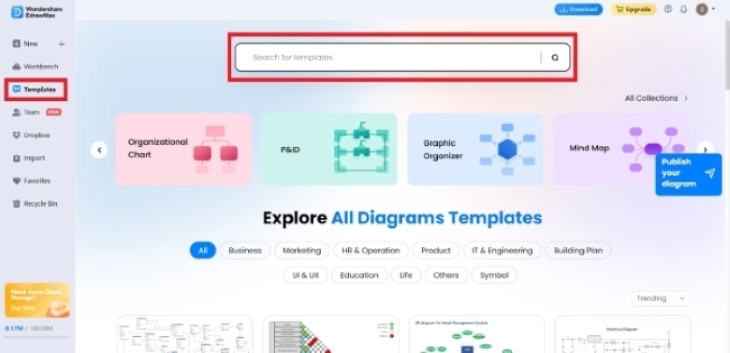
If you’re stuck for ideas on how to design a flowchart, the EdrawMax community has over 1500 pre-made templates to choose from. Templates may be accessed using the left-hand menu. Type the name of the template you want to use in the box labelled “Search for templates.” The search results are located at the bottom of the page. Choose one of the many helpful diagrams or flowcharts.
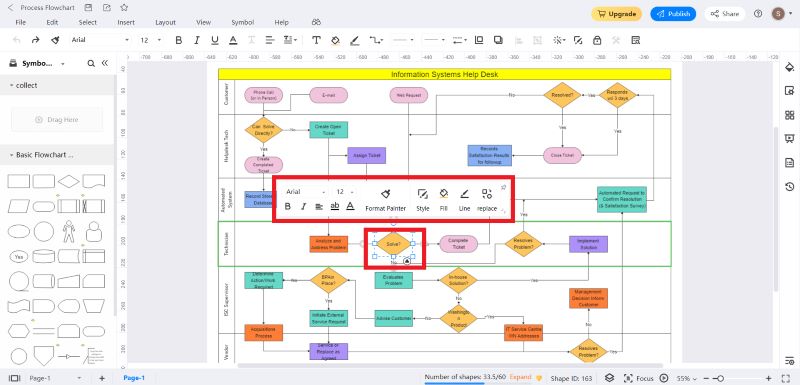
Step 5: Add Shapes and Symbols
Labels and text boxes should be straightforward. However, make sure it is pleasing to the eye and simple to grasp at a glance. Choose from over 26,000 icons to add clarity to your diagram. The most common flowchart symbols should be familiarised with before attempting to create one. EdrawMax’s templates and diagrams are designed to have associated symbols and shapes pop up when you choose them. If you don’t see the Symbol Library option on the left sidebar, click it now. Select Flowchart in the Symbol Library dialogue box, and then click OK.
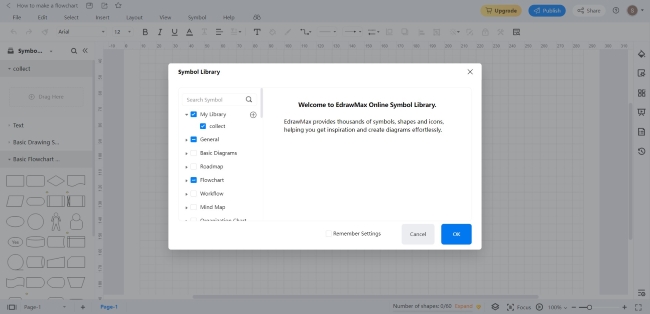
Select Basic Flowchart from the Symbol Library drop-down menu on the left side of the screen, then pick a symbol to add. Put it where you want to draw by dragging it there.
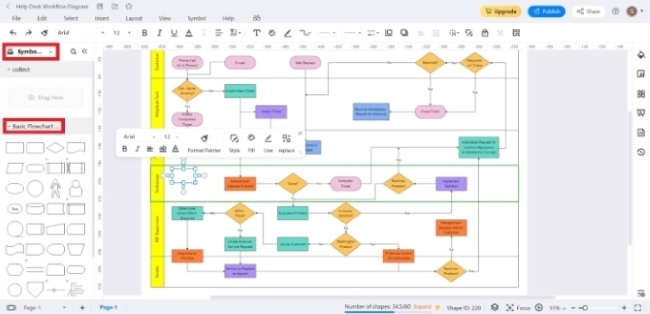
Step 6: Connect the Shapes with Lines and Arrows
Lines and arrows in a flowchart indicate a logical progression of events. But check that the arrows are pointing in the right way. Anyone can glance at it and understand what it says without having to read the whole manual. Furthermore, make sure there is no unnecessary crisscrossing of lines. Insert a beginning or ending arrow line by clicking the form on the drawing canvas. Keep the cursor angled until a red dot appears. Connect the red dot to another form on the canvas by clicking on it. Those directional lines need to be generated mechanically. Alternatively, you may access the line and arrow icons at the beginning and end of the document by clicking the corresponding icons in the top navigation bar.
![]()
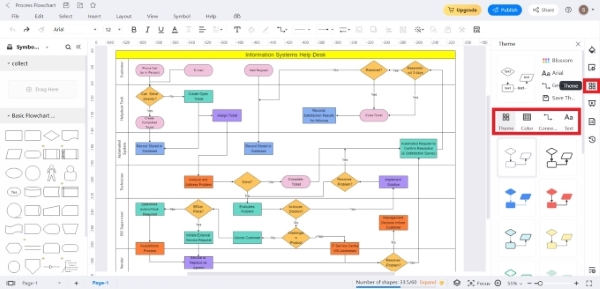
Step 7:Optimize the Flowchart Appearance
Improve the readability and usability of your flowchart by following these steps. Clutter may also be reduced by getting rid of things that aren’t needed. You may further customize your flowchart in the following ways.
Pick Your Topic: The theme may be accessed using the button on the right side of the menu. Alter the look of your flowchart by changing its background, colours, and connectors as well as the size and style of the text.
Depending on the kind of form, you may assign a different colour to each one. Just choose the desired form and click the “Edit” button to make changes to its appearance. A Style/Fill/Line window will appear. Make the necessary changes to suit your tastes.
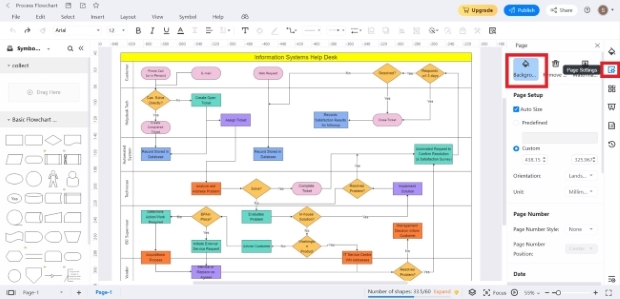
Premium users of EdrawMax have access to additional features, one of which is the ability to choose a custom backdrop colour. Select the Page button on the right side of the toolbar for further controls. In the Page menu, choose Background.
Step 8: Optimize the Flowchart Appearance
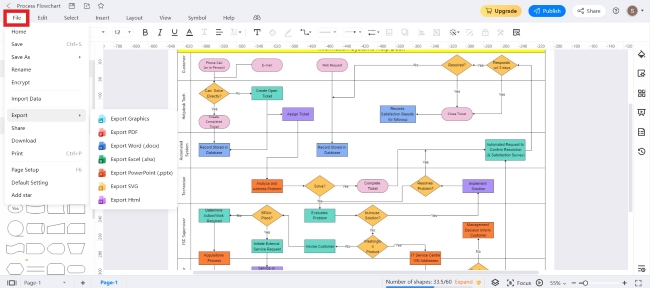
You may save your flowchart to the cloud, Google Drive, or Dropbox by publishing it. Choose “Save as” and then “Cloud file” from the main menu’s “File” tab.
In addition, EdrawMax supports exporting to a number of other file types. Your flowchart may be exported to a variety of formats, including PDF, Word, Excel, and PowerPoint. Just go up to File > Export in the menu bar and go from there. Afterward, decide which format you’d want to use.
You may inform your group by sending them a link to your flowchart, posting it on social media, or embedding its HTML. To share a file, choose File>Share from the main menu.
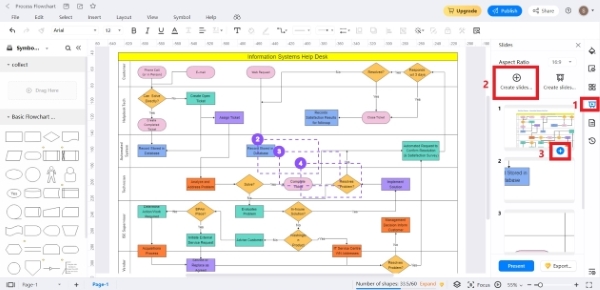
Presenter Mode Display: Put your flowchart on slides and share it with others. On the menu that appears, choose Slide. To make your own slides, go to the Slides menu and click the Create Slides manually button. Add extra slides by clicking the plus sign that appears underneath each one. Select “Present” in the presentation window.
3. Practical Tips for Making a Good Flowchart
Flowcharts are a common visual aid used by many people nowadays. Make use of them in your discussions, studies, and general organizing. Here are some helpful hints for creating flowcharts, which may be put to use in a variety of contexts.
One, stick to a consistent colour scheme and font style/size that is easy to read; several colours in a single chart are confusing. That implies your flowchart’s whole colour palette should be consistent. Avoid using cursive or other decorative fonts, and make sure the font size is sufficient so that the whole document can be read without straining the eyes. It also creates a more unified appearance and is easy on the eyes of the audience. Reduce the size of the flowchart: All too often, a multi-page flowchart is reduced to a single page. There are two ways to handle this situation. The first is to streamline the flowchart such that it accurately depicts your thoughts. Or, you may dissect your flowchart into sub-diagrams. Third, maintain a consistent flow direction; most flows are either vertical or horizontal, but you shouldn’t combine them. All of the motion should go in the same direction. If your flowchart reads from left to right, then all of the arrows should follow that direction. Top-down flowcharts usually have their arrow lines pointing downward. 4. Use Coherent Branching: Don’t throw the reader off by switching tacks in the middle of your argument. It’s a must-have if you’re making a flowchart to clarify a complicated topic. The best method to demonstrate this is using Decision symbols. When things go well, they’re supposed to be true, and when they go wrong, they’re supposed to be false. To maintain uniform spacing between shapes and the symbol, it is recommended that you choose a sign of the same size and shape. If you’re using symbols, align them all in a row or column. The grid of EdrawMax’s drawing canvas ensures everything is perfectly aligned and spaced out. Your flowchart will seem more polished if you use consistent spacing.
4. Final Thoughts
Whether you use them for business or play, flowcharts are a useful tool for organizing your thoughts and activities. Creating a flowchart may appear complicated at first, but by using EdrawMax, you’ll quickly find that it’s really rather simple. It’s important to keep a few things in mind before you get started so that your flowcharts come out looking as polished as possible.
Follow Techiemag for more!
Table of Contents


