
Let’s admit, Google’s new WEBP image file format is pretty awesome. In fact, it’s much better than the standard JPG, JPEG, or PNG format. The reason behind it is that it creates a much smaller file size than any other image file format. Not only that, but the modern image file format from Google also supports the transparency feature of PNG.
Bloggers and web designers mostly use the WEBP image file format. Since it’s a new file format, it’s not supported by most of the image viewers. You might have already dealt with such issues where the photo viewer of Windows fails to open the WEBP file format.
How To Convert Google’s WEBP Images to JPG or PNG
The good thing is that the WEBP file format can easily be converted into JPG or PNG format. There are many ways to save WEBP images to JPG or PNG, and each of them has its own advantage. So, in this article, we are going to share some of the best methods to convert WEBP images to JPG or PNG.
1. Using Microsoft Paint
In this method, we are going to use Microsoft Paint to convert WEBP images to JPG or PNG file format. Follow some of the simple steps given below to convert WEBP images via Microsoft Paint.
Step 1. First of all, open Microsoft Paint on your PC.
Step 2. Now click on the ‘File’ and then select ‘Open’. You need to import the WEBP image file.
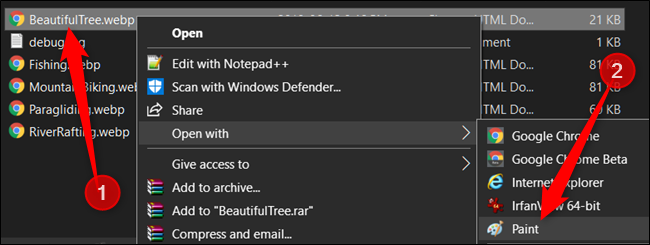
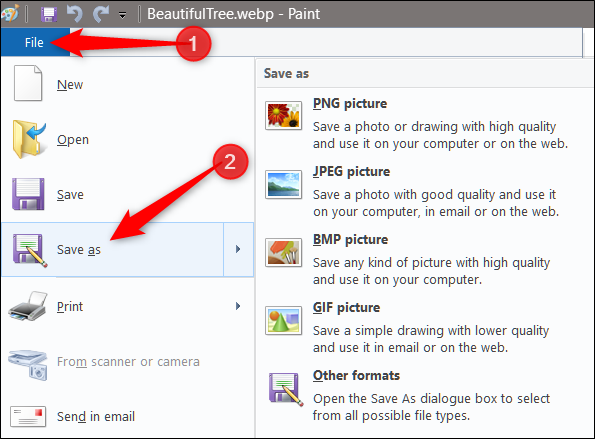
Step 3. Once imported, click on the ‘File > Save As’. It will open a new window; there you need to select ‘JPEG’ or ‘PNG’ under the save as type.
That’s it! You are done. This is how you can use Microsoft Paint to convert WEBP files into JPG or PNG.
2. Using Photoshop
Adobe Photoshop can be used to convert the WEBP files into JPG or PNG. However, if you are using an older version of Photoshop, then you need to follow a few additional steps given below.
- First of all, download the plugin from ‘Github‘
- Copy the plug-in file WebPShop.8bi located in binWebPShop_0_3_0_Win_x64 to the Photoshop installation folder, usually C:Program FilesAdobeAdobe PhotoshopPlug-ins for x64.
- Restart Photoshop. “Open” and “Save” menu commands should now show WebP files.
Now Adobe Photoshop would be ready to load the WEBP file format. To convert the file into a different format, follow the steps given below.
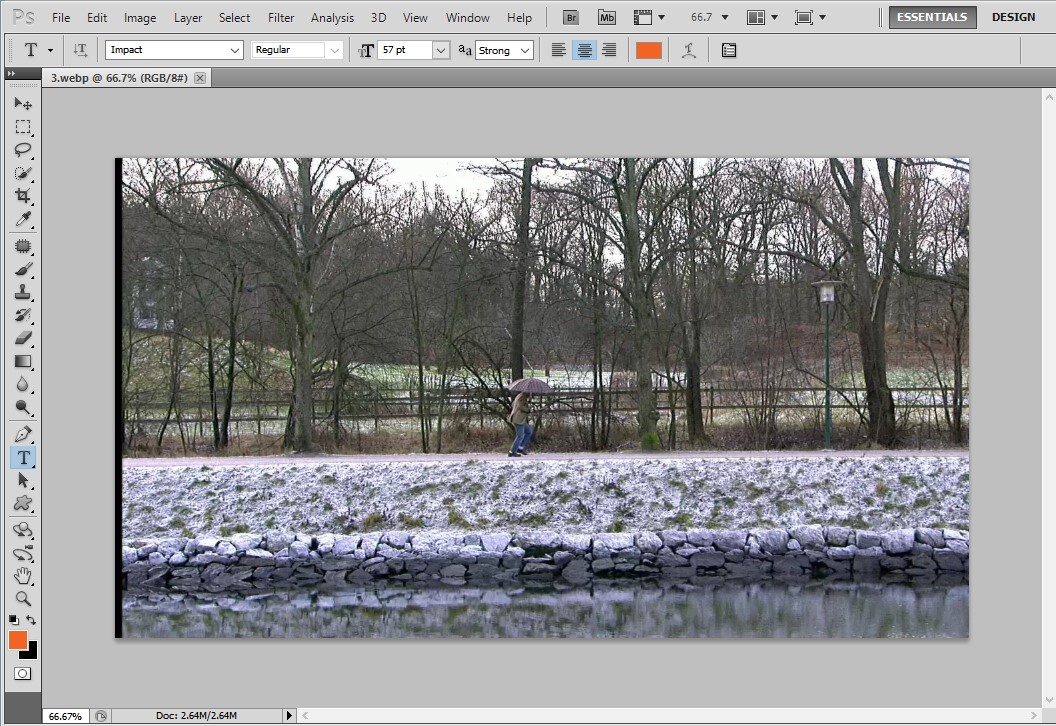
Step 1. First of all, load the WEBP image on Adobe Photoshop.
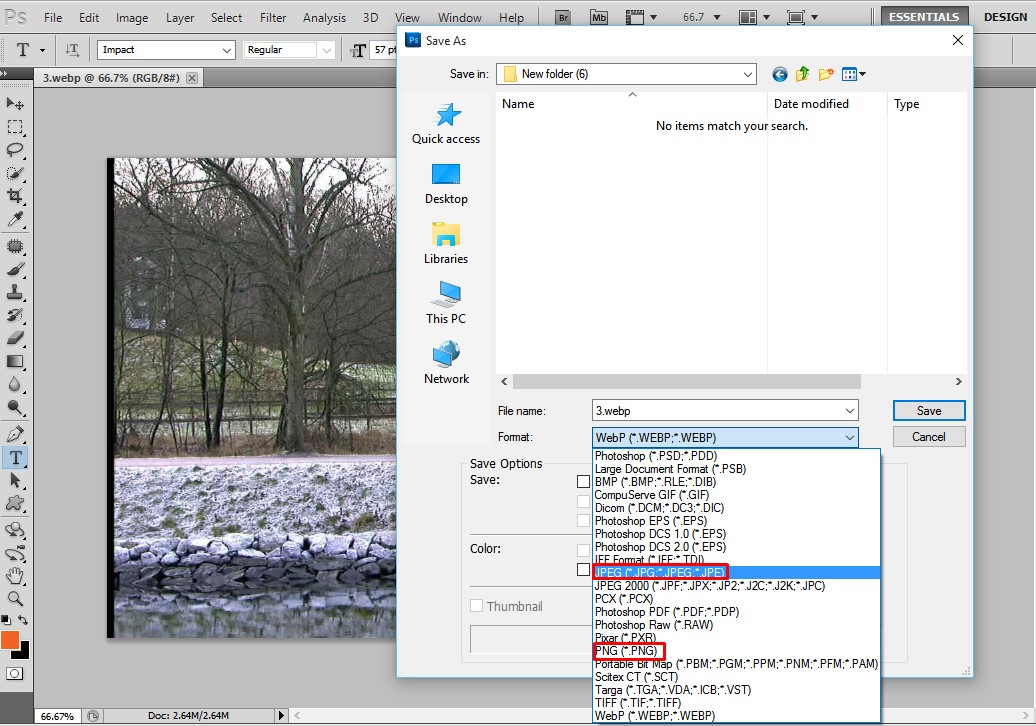
Step 2. Once done, click on the ‘File > Save As’. It will open a new window; there you need to select the file format of your choice under the ‘Save as type’
That’s it! You are done. This is how you can convert WEBP into JPEG or PNG using Adobe Photoshop.
3. Using Online Converters
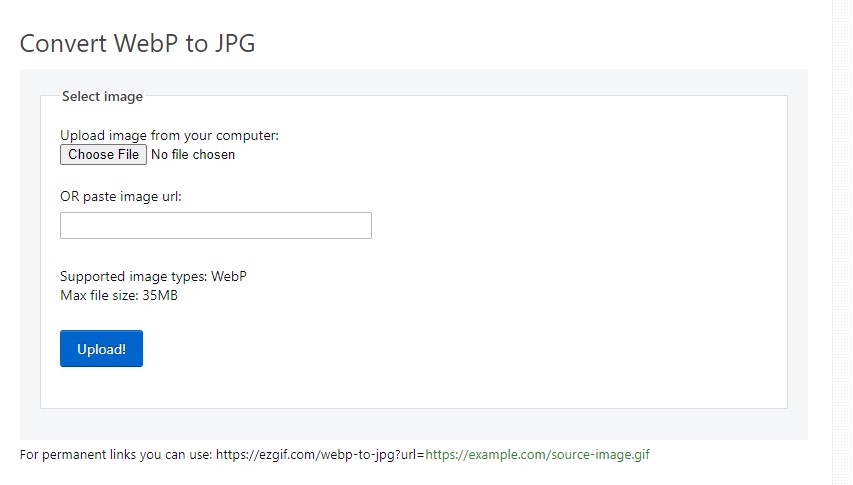
There are lots of image converters available on the web that can convert your images into different file formats. You can use any of them. Just search for ‘WEBP into JPG’ or ‘WEBP into PNG’ converter on the search engine. It will show you hundreds of websites, and you can use any of them.
So, this is all about how to convert WEBP images to JPG or PNG format in 2020. I hope this article helped you! Share it with your friends also.
Table of Contents


![TikTok Download PC [2021]](https://www.techiemag.net/wp-content/uploads/2021/09/tiktokgames1-1582147342563-100x75.jpg "TikTok Download PC [2021]")